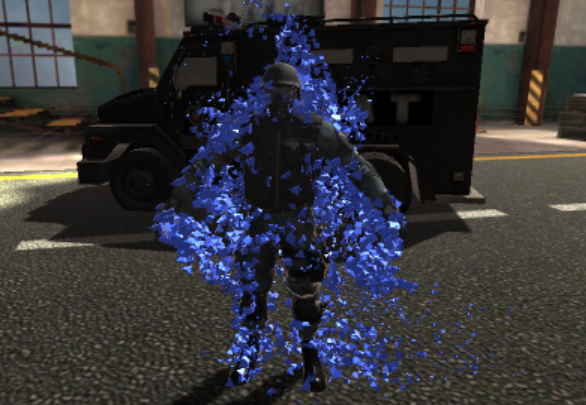
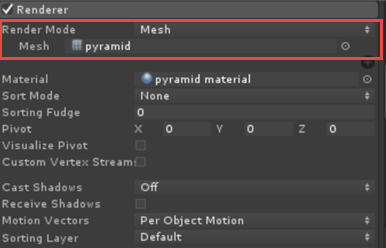
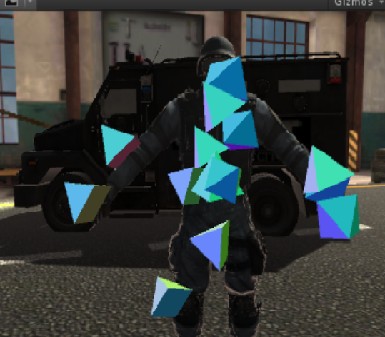
金字塔粒子
Unity默认的粒子形状为四边形。首先,您需要使用金字塔对象将此形状更改为金字塔,或者使用几何体着色器将四边形变为金字塔。
折射
要制作碎玻璃效果(折射),可以使用
GrabPass { "TextureName" }它将屏幕内容抓取为纹理。
GrabPass是一种特殊的传递类型-它捕获要将对象绘制到纹理中的屏幕内容。可以在后续遍中使用此纹理来执行基于图像的高级效果。
https://docs.unity3d.com/Manual/SL-GrabPass.html
Shader "Smkgames/GlassRefraction"
{
    Properties{
        _Refraction("Refraction",Float) = 0.05
        _Alpha("Alpha",Range(0,1)) = 1
    }
    SubShader
    {
Tags {"Queue"="Transparent" "RenderType"="Transparent"}

        Blend SrcAlpha OneMinusSrcAlpha

        GrabPass
        {
            "_GrabTexture"
        }

        Pass
        {
            CGPROGRAM
            #pragma vertex vert
            #pragma fragment frag

            #include "UnityCG.cginc"

            struct appdata
            {
                float4 vertex : POSITION;
            };

            struct v2f
            {
                float4 grabPos : TEXCOORD0;
                float4 vertex : SV_POSITION;
            };
            sampler2D _MainTex;
            float _Alpha,_Refraction;

            v2f vert (appdata v)
            {
                v2f o;
                o.vertex = UnityObjectToClipPos(v.vertex);
                o.grabPos = ComputeGrabScreenPos(o.vertex);
                return o;
            }

            sampler2D _GrabTexture;

            fixed4 frag (v2f i) : SV_Target
            {
                fixed4 col = tex2Dproj(_GrabTexture, i.grabPos+_Refraction);
                return float4(col.rgb,_Alpha);

            }
            ENDCG
        }
    }
}
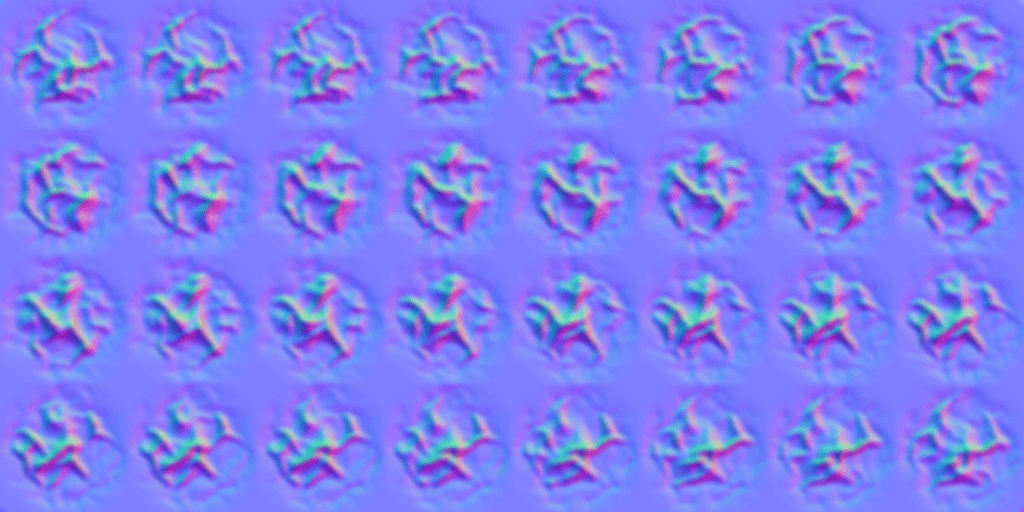
使用网格法线
让我们继续使用在世界空间中显示网格法线的着色器。我使用它是因为我想看三维断面形状。
    Shader "Smkgames/BrokenGlass3D"
{
    Properties{
        _MainTex("MainTex",2D) = "white"{}
        _Alpha("Alpha",Float) = 1
    }
    SubShader
    {
Tags {"Queue"="Transparent" "RenderType"="Transparent"}
 Blend SrcAlpha OneMinusSrcAlpha


        GrabPass
        {
            "_GrabTexture"
        }

        Pass
        {
            CGPROGRAM
            #pragma vertex vert
            #pragma fragment frag

            #include "UnityCG.cginc"

            struct appdata
            {
                float4 vertex : POSITION;
                float2 grabPos : TEXCOORD0;
                float3 normal :NORMAL;
            };

            struct v2f
            {
                float4 grabPos : TEXCOORD0;
                float4 vertex : SV_POSITION;
                half3 worldNormal :TEXCOORD1;

            };
            sampler2D _MainTex;
            float _Intensity,_Alpha;

            v2f vert (appdata v)
            {
                v2f o;
                o.vertex = UnityObjectToClipPos(v.vertex);
                o.grabPos = ComputeGrabScreenPos(o.vertex);
                o.worldNormal = UnityObjectToWorldNormal(v.normal);
                return o;
            }

            sampler2D _GrabTexture;

            fixed4 frag (v2f i) : SV_Target
            {
                fixed4 c = 0;
                c.rgb = i.worldNormal*0.5+0.5;
                float4 distortion = tex2D(_MainTex,i.grabPos)+_Intensity;
                fixed4 col = tex2Dproj(_GrabTexture, i.grabPos+c.r);
                return float4(col.rgb,_Alpha);
            }
            ENDCG
        }
    }
}
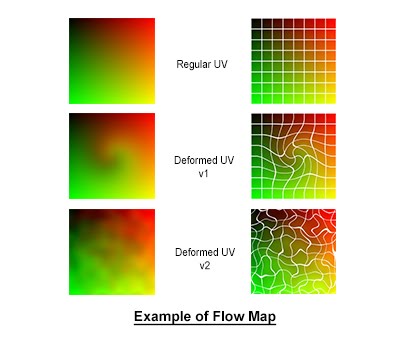
热变形
要产生热变形,可以使用流程图
流程图是一种在纹理中存储2d方向信息的纹理。像素的颜色使用uv坐标纹理作为基础来确定像素的方向。颜色越多,比例速度就越快。示例绿色告诉它左上,中心是中立,红色告诉右下。对于水之类的液体材料,这是一种有用的技术,并且是仅平移节点的有用替代方法。
    Shader "Smkgames/HeatDistortion"
{
    Properties{
        _DistortionMap("DistortionMap",2D) = "white"{}
        _Intensity("Intensity",Float) = 50
        _Mask("Mask",2D) = "white"{}
        _Alpha("Alpha",Range(0,1)) = 1
    }
    SubShader
    {
Tags {"Queue"="Transparent" "RenderType"="Transparent"}

        GrabPass
        {
            "_GrabTexture"
        }

        Blend SrcAlpha OneMinusSrcAlpha

        Pass
        {
            CGPROGRAM
            #pragma vertex vert
            #pragma fragment frag

            #include "UnityCG.cginc"

            struct appdata
            {
                float4 vertex : POSITION;
            };

            struct v2f
            {
                float4 grabPos : TEXCOORD0;
                float4 vertex : SV_POSITION;
            };
            sampler2D _Mask,_DistortionMap;
            float _Alpha,_Refraction;

            v2f vert (appdata v)
            {
                v2f o;
                o.vertex = UnityObjectToClipPos(v.vertex);
                o.grabPos = ComputeGrabScreenPos(o.vertex);
                return o;
            }

            sampler2D _GrabTexture;
            float _Intensity;

            fixed4 frag (v2f i) : SV_Target
            {
                float mask = tex2D(_Mask,i.grabPos);
                mask = step(mask,0.5);
                //mask = smoothstep(mask,0,0.4);
                float4 distortion = tex2D(_DistortionMap,i.grabPos+_Time.y)+_Intensity;
                fixed4 col = tex2Dproj(_GrabTexture, i.grabPos*distortion);
                return float4(col.rgb,mask*_Alpha);

            }
            ENDCG
        }
    }
}
使用常规的另一个示例:
Shader "Smkgames/HeatDistortion2" {
Properties {
        _CutOut ("CutOut (A)", 2D) = "black" {}
        _BumpMap ("Normalmap", 2D) = "bump" {}
        _BumpAmt ("Distortion", Float) = 10
}

Category {

    Tags { "Queue"="Transparent"  "IgnoreProjector"="True"  "RenderType"="Opaque" }
    Blend SrcAlpha OneMinusSrcAlpha
    Cull Off
    Lighting Off
    ZWrite Off
    Fog { Mode Off}

    SubShader {
        GrabPass {
            "_GrabTexture"
        }
        Pass {

CGPROGRAM
#pragma vertex vert
#pragma fragment frag
#pragma fragmentoption ARB_precision_hint_fastest
#pragma multi_compile_particles
#include "UnityCG.cginc"

struct appdata_t {
    float4 vertex : POSITION;
    float2 texcoord: TEXCOORD0;
};

struct v2f {
    float4 vertex : POSITION;
    float4 uvgrab : TEXCOORD0;
    float2 uvbump : TEXCOORD1;
    float2 uvcutout : TEXCOORD2;
};

sampler2D _BumpMap,_CutOut,_GrabTexture;
float _BumpAmt;
float4 _GrabTexture_TexelSize;
float4 _BumpMap_ST,_CutOut_ST;

v2f vert (appdata_t v)
{
    v2f o;
    o.vertex = UnityObjectToClipPos(v.vertex);
    o.uvgrab.xy = (float2(o.vertex.x, o.vertex.y*-1) + o.vertex.w) * 0.5;
    o.uvgrab.zw = o.vertex.zw;
    o.uvbump = TRANSFORM_TEX( v.texcoord, _BumpMap );
    o.uvcutout = TRANSFORM_TEX( v.texcoord, _CutOut );
    return o;
}


half4 frag( v2f i ) : COLOR
{
    half2 bump = UnpackNormal(tex2D( _BumpMap, i.uvbump )).rg;
    float2 offset = bump * _BumpAmt * _GrabTexture_TexelSize.xy;
    i.uvgrab.xy = offset * i.uvgrab.z + i.uvgrab.xy;

    half4 col = tex2Dproj( _GrabTexture, UNITY_PROJ_COORD(i.uvgrab));
    fixed4 cut = tex2D(_CutOut, i.uvcutout);
    fixed4 emission = col;
    emission.a = (cut.a);
    return emission;
}
ENDCG
        }
    }

  }
}
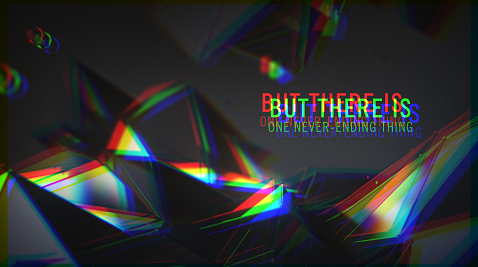
RGB分割
如果您注意您的第一个gif,您会看到很少的RGB分割。
Shader "Hidden/RgbSplit"
{
    Properties
    {
        _MainTex ("Texture", 2D) = "white" {}
        _NoiseTex1 ("Noise Texture A", 2D) = "white" {}
        _NoiseTex2 ("Noise Texture B", 2D) = "white" {}
    }
    SubShader
    {

        Pass
        {
            CGPROGRAM
            #pragma vertex vert
            #pragma fragment frag

            #include "UnityCG.cginc"

            struct appdata
            {
                float4 vertex : POSITION;
                float2 uv : TEXCOORD0;
            };

            struct v2f
            {
                float2 uv : TEXCOORD0;
                float4 vertex : SV_POSITION;
            };

            v2f vert (appdata v)
            {
                v2f o;
                o.vertex = UnityObjectToClipPos(v.vertex);
                o.uv = v.uv;
                return o;
            }

            sampler2D _MainTex,_NoiseTex1,_NoiseTex2;
            float3 colorSplit(float2 uv, float2 s)
{
    float3 color;
    color.r = tex2D(_MainTex, uv - s).r;
    color.g = tex2D(_MainTex, uv    ).g;
    color.b = tex2D(_MainTex, uv + s).b;
    return color;
}

float2 interlace(float2 uv, float s)
{
    uv.x += s * (4.0 * frac((uv.y) / 2.0) - 1.0);
    return uv;
}

    fixed4 frag (v2f i) : SV_Target
    {

    float t = _Time.y;

    float s = tex2D(_NoiseTex1, float2(t * 0.2, 0.5)).r;

    i.uv = interlace(i.uv, s * 0.005);
    float r = tex2D(_NoiseTex2, float2(t, 0.0)).x;

    float3 color = colorSplit(i.uv, float2(s * 0.02, 0.0));

    return float4(color, 1.0);

            }
            ENDCG
        }
    }
}
有用的链接
https://www.fxguide.com/featured/time-for-destruction-the-tech-of-quantum-break/
来源Github